
Threat information sharing has long been a hot topic. The idea behind information sharing is fairly simple: After an organization gets attacked and successfully recovers, that organization can then share the solution with everyone else. This way, organizations help strengthen each other.
Information Sharing and Analysis Organizations (ISAOs) and Information Sharing and Analysis Centers (ISACs) exist to provide invaluable information like this. These organizations are central resources for gathering and disseminating information about hacker techniques and cybersecurity issues to private and public companies. In fact, the CompTIA ISAO tailors proactive threat intelligence and actionable analysis to meet the needs of technology companies and provides cybersecurity professionals working for these organizations with a trusted community of peers where you can share cybersecurity information and best practices.
Threat intelligence feeds such as AlienVault OTX, Blocklist.de, URLhaus, and many others, are also available. No matter what organization or threat intelligence feed you choose, it’s up to you to leverage that information as much as possible. After all, wouldn’t it be nice if you could further customize and store information that you receive into your own database?
Why You Need a Cybersecurity Knowledge Base
Threat intelligence feeds work best when they act as a starting point. First, an ISAO, ISAC or threat feed captures real-life examples of exploits that are specific to an organization’s systems. But, that's just the beginning.
Cybersecurity professionals are expected to customize and contextualize that information. They supplement given information with more specific knowledge about indicators of attack (IoA) and indicators of compromise (IoC) that are happening to their organization. Then they can investigate each tactic, technique and procedure (TTP) of a specific attack waged on the organization.
Here’s a quick overview of the difference between a tactic, technique and a procedure:
- Tactic: A goal (e.g., the hacker wishes to extort money from a hospital through ransomware)
- Technique: A particular activity (e.g., sending phishing emails to the people most likely to click on the link or attacking systems that are known to have a buffer overflow, like a low patch level, or some other vulnerability)
- Procedure: The actual methods – as specific and procedural as possible – used to obtain information about vulnerable end users or systems (e.g., the details about the steps the attacker took to conduct a ransomware attack on your particular network)
Build Your Own Cybersecurity Knowledge Base
Successful cybersecurity professionals build on past successes and learn from previous missteps. That's the whole idea of an ISAO. Creating a cybersecurity knowledge base can help you do that, and an ISAO provides the ability to store that information. It keeps you from spending time re-studying and re-discovering the same problems and solutions over and over.
If you're studying for cybersecurity certifications, such as CompTIA Security+ or CompTIA Cybersecurity Analyst (CySA+), you'll find that both expect you to have a working knowledge of typical cybersecurity threats. CySA+ especially expects you to understand how threat intelligence feeds work.
Cybersecurity professionals use their cybersecurity knowledge base to record specific TTPs. And there’s a free proof-of-concept tool that you can use to practice this activity. Yeti, an open-source tool, makes this possible. No, I’m not talking about the Yeti coolers that everyone wants these days. I’m talking about a threat intelligence platform.
Yeti implements the Trusted Automated eXchange of Indicator Information (TAXII) protocol, which is often used by threat intelligence sharing services. This makes it possible to obtain and share information both within and outside of your organization. Once you get Yeti going, you (or anyone with an account) can log in and share information about TTPs.
If you subscribe to an ISAO or ISAC, you already have a more sophisticated service than Yeti. But if you're still studying threat intelligence feeds, setting up your own threat intelligence platform helps you better understand the world of threat feeds and threat intelligence sharing.
How to Install the Yeti Threat Intelligence Platform
If you’re interested in getting Yeti going yourself, I found these sites on downloading Yeti and configuring Yeti from a virtual environment very helpful.
I installed Yeti on one of my machines named “tf1.stangernet.com”. I named it tf1, because it’s my first live threat feed system.
Once I downloaded the Yeti source files, I had the option of starting it in a couple of different ways. I found it most useful to run Yeti inside of a Python virtual environment right inside my home directory.
Here’s how I did it.
| Step | Command | Description |
| 1. | james@tf1$ cd ~/yeti | Change to the Yeti directory. |
| 2. | james@tf1:~/yeti$ virtualenv -p /usr/bin/python2.7 venv | Identify the virtual environment I wish to have Python use. In this case, I want the Python 2.7 environment. |
| 3. | james@tf1:~/yeti$ source venv/bin/activate | This activates the virtual machine. |
| 4. | (venv) james@tf1:~/Desktop/yeti$ pip install -r | Installs the required files to run Yeti. Notice how the command line now has “(venv)” in front of the command prompt. |
| 5. | (venv) james@tf1:~/yeti$ yarn install | Installs the yarn application, which is used to connect (or thread together) threat feed information. |
| 6. | (venv) james@tf1:~/yeti$ sudo /etc/init.d/mongodb start | Starts the MongoDB database. |
| 7. | (venv) james@tf1:~/yeti$ sudo /etc/init.d/mongodb start | Verifies that MongoDB is running. Yeti won’t work properly unless it is running. |
| 8. | (venv) james@tf1:~/yeti$ $ ./yeti.py webserver | Starts Yeti. Notice that I didn’t have to use the sudo command or become root. |
Figure 1 below gives a quick snapshot of the commands I issued in my virtual environment to get Yeti and its web server up and running.
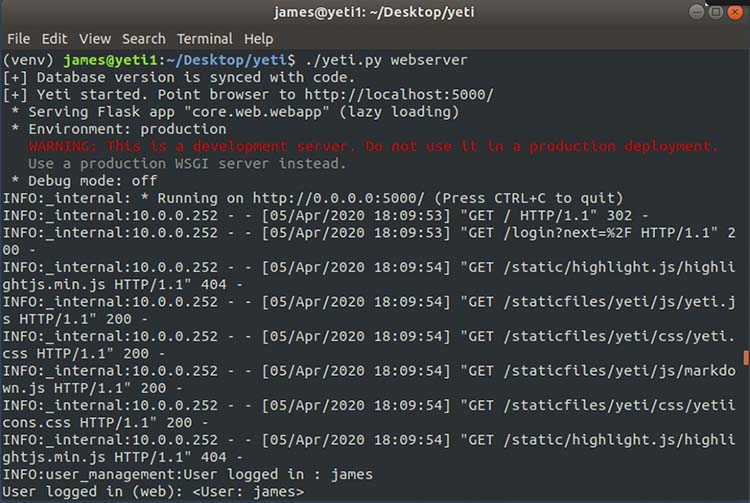
Figure 1: Running Yeti
With Yeti running a web server on port 5000 on my system, I can now access it using a web browser from either the local system running Yeti or from a remote system. The version of Yeti that I installed had an administrative account available, and I was able to change the password and create new administrative and non-administrator usernames.
Figure 2 shows some of the investigations that I have imported into my cybersecurity knowledge database.
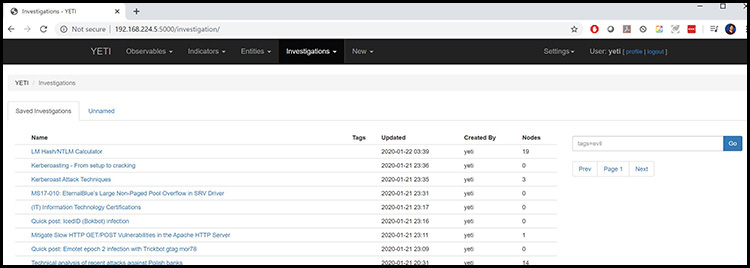
Figure 2: Some sample investigations I have imported into Yeti
How Cybersecurity Analysts Use Threat Intelligence Platforms
Now that I have Yeti installed, let’s take a look at how to use it. Let’s suppose that I worked for a hospital. I could record information about attacks specific to my organization using Yeti. For example, if I was worried about an attacker obtaining a Kerberos Golden Ticket via Mimikatz, then I would start storing information about this particular form of attack. Or if I discovered several attack attempts, I could record the information easily inside of Yeti.
Many organizations are enduring Distributed Denial of Service (DDoS) attacks. Let’s suppose that I was a cybersecurity professional asked to record DDoS attacks specific to the Memcached service, which is often used to speed up web applications by storing information in memory.
Attackers use poorly configured Memcached services to wage DDoS attacks. So, if I wanted to record information about actual Memcached attacks, I would log on to Yeti, then go to Investigations > Import to upload information.
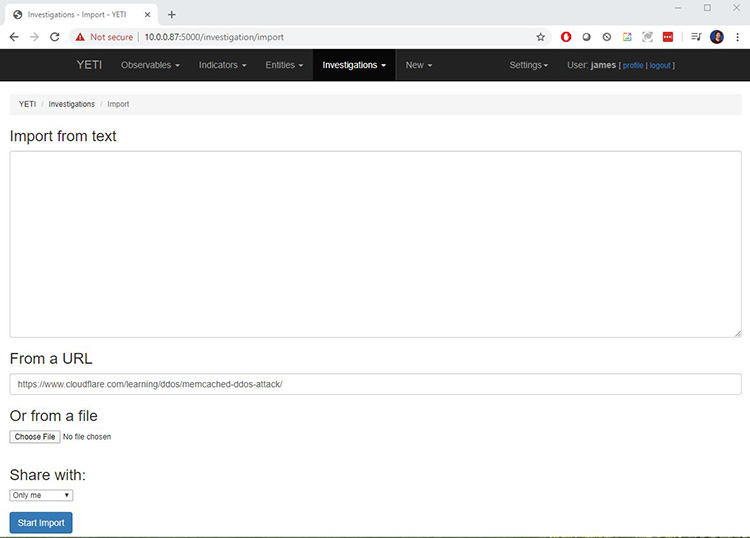
Figure 3: Importing information into Yeti
Once I click on the Start Import button, Yeti parses the information, as shown in Figure 4.
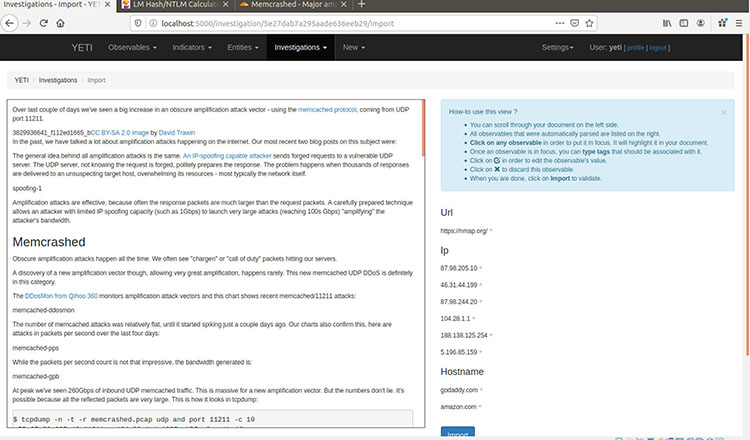
Figure 4: How Yeti parses imported information
From here, I can edit the information I wish to import. I would only want to include relevant information that helps my fellow workers recover from this specific attack.
For example, I could focus on a specific technique, such as investigating the IP address 188.138.125.254 and its relationship to the Cloudflare organization. I might find that it’s completely non-threatening and standard. Or, I might decide it’s an indicator of attack. This is an example of the types of decisions made by cybersecurity analysts.
Based on this information, I could then create links from one system to another to uncover useful information about the source of the attack. Figure 5 below shows how I attempted to link several sites to try and identify a specific cause of an attack. It’s a pretty messy map, but cybersecurity professionals are expected to sift through and sort messy information so that it’s more useful.
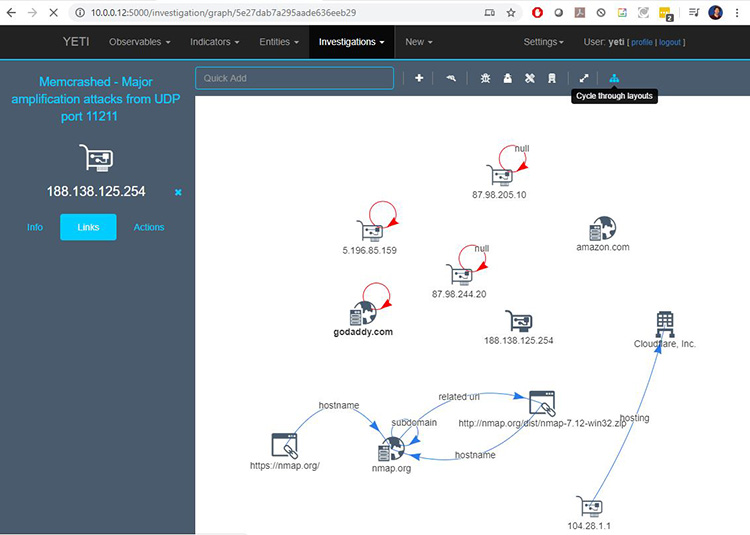
Figure 5: Editing information in Yeti
Let me show you a more modest example. In this case, I have imported information about a possible ransomware attack to learn more about some of the hosts. I can use Yeti to conduct queries about the IP addresses and DNS names using the Whois service or website scanners such as ThreatCrowd and UrLScanlo, as shown in Figure 6.
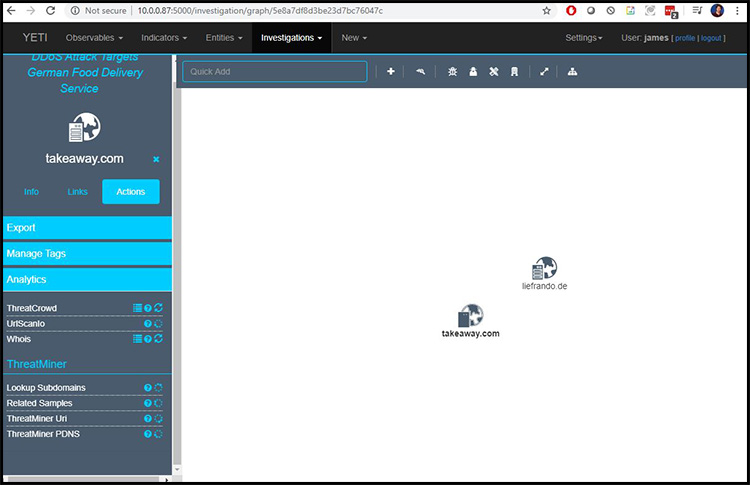
Figure 6: Investigating resources in Yeti
Figures 7 and 8 show the results of Whois and Nmap scans.
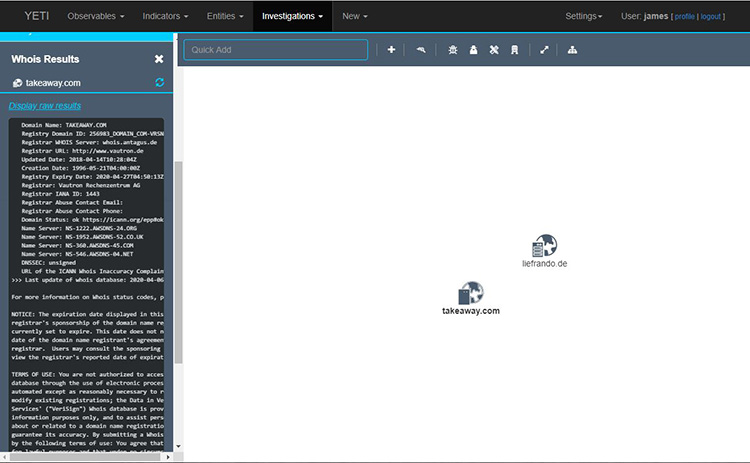
Figure 7: Viewing Whois information in Yeti
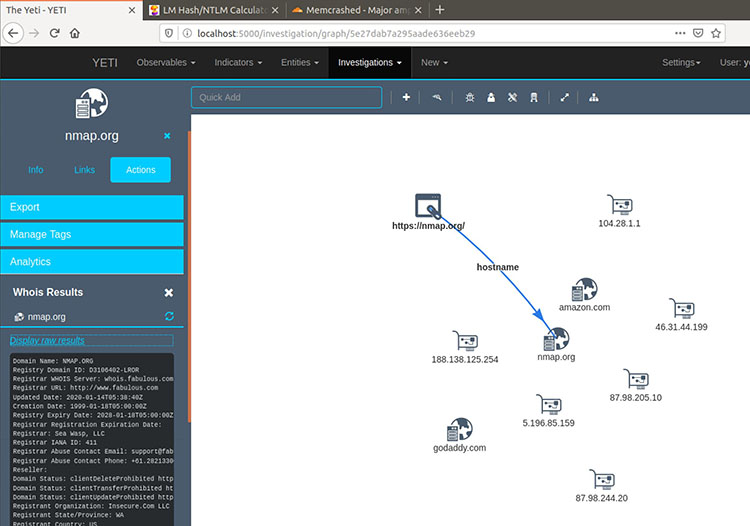
Figure 8: Using Nmap with Yeti
Configuring Threat Intelligence Feeds
You’re not limited to creating your own threat intelligence feed. If you have accounts for third-party threat feed organizations, you can manage them in Yeti.
For example, let's say that you have created an account for a common threat information sharing service or for your ISAO. You can then configure Yeti to go to that service and obtain that information automatically. All you have to do is enter the relevant authentication information into Yeti's configuration file (yeti.conf).
In Settings > Data Flows, you can see the results of the threat feeds you have configured, as shown in Figure 9.
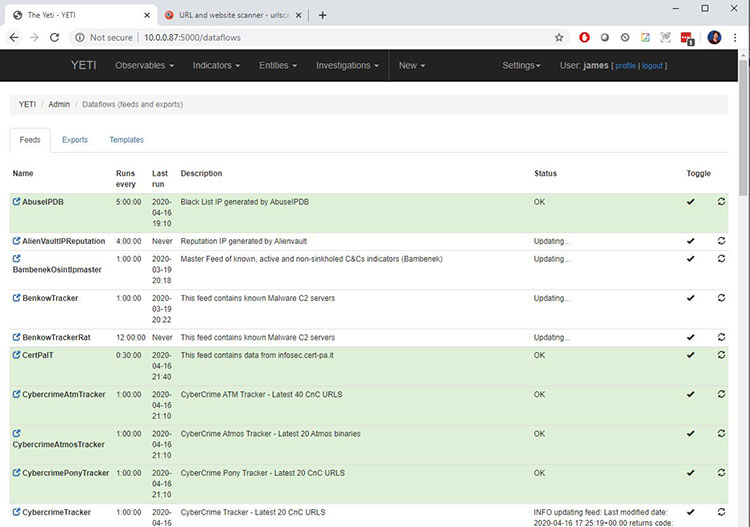
Figure 9: Viewing threat feed configurations in Yeti
In this example, I have configured several threat intelligence feeds. By taking these steps, you're now leveraging ISAO, ISAC and threat intelligence feed information to create your own cybersecurity knowledge base.
Taking Threat Intelligence to the Next Level
When it comes to creating your own knowledge base, don’t just import a few URLs and call it good. If you really want to customize the data you obtain and make it useful, learn how to tag your TTP data using a markup language, such as Yara. Once you do this, you and others can then conduct granular searches of your cybersecurity knowledge base.
You can, for example, define new malware entities and threat actors relevant for your company. If you have discovered a new exploit, then you can use Yara and other tools found in Yeti to document it and share it with others.
Because Yeti is a TAXII-enabled server, you can obtain and share information as you wish. If you have the time or need, you can even configure Yeti to become a standalone, production web server.
Whether your cybersecurity team wants to better leverage and customize information obtained from an ISAO, ISAC or threat intelligence feed or you’re looking to do some self-study, setting up a threat intelligence platform and cybersecurity knowledge base helps to further contextualize that information and supplement it with your own observations. No matter what your need is, free threat intelligence tools such as Yeti can help you collect, organize and share threat intelligence information, such as tactics, techniques and procedures, so you can build your cybersecurity knowledge base and protect your organization more efficiently.
CompTIA Cybersecurity Analyst (CySA+) covers the skills used by cybersecurity analysts, including how to use and apply threat intelligence. To see what else it covers, download the exam objectives.

